Project Life Cycle
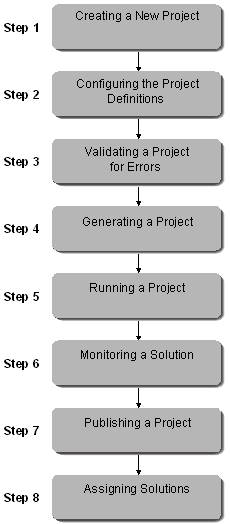
The process of defining and publishing a project consists of the following stages:
|
1.
|
Creating a New Project: Click New to create a new project. |
|
2.
|
Configuring the Project Definitions: The process of defining a project involves defining each of the branches in the project tree: |
Quick Callouts
Tooltips
Client-to-Client
References
|
3.
|
Validating a Project for Errors:, Click Validate to validate the main project by analyzing the project's objects and to display a list of erroneous objects that describes each object's error (see Validating Project Errors |
|
4.
|
Generating a Project: Click Generate to generate the project files locally on the Real-Time Designer machine. The files that are generated are described in Projects. This option is for testing purposes only. When you publish the project, it is generated again. |
|
5.
|
Running a Project: Click Run Real-Time Client to run the project locally for testing purposes. |
|
6.
|
Monitoring a Solution: Click Monitor to debug a running project as a Real-Time Client by viewing and affecting its values and processes behind the scenes. |
|
7.
|
Publishing a Project: Click Publish to upload the project files to the Real-Time server. The server prepares tables for such things as the data collection aspect of the project. |
|
8.
|
Assigning Solutions: Use the Solution Assignment branch in the tree to specify which solutions are downloaded by the Real-Time server to which users of the Real-Time Client when it launches. Refer to the System Administration Guide for details. |


